logo elektroda
logo elektroda
X
logo elektroda
WERBUNG
Treść została przetłumaczona Polnisch » Deutsch Zobacz oryginalną wersję tematu
📢 Anhören (AI):
  • #61 19178212
    Anonym
    Niveau 1  
  • WERBUNG
  • #62 19178224
    piotr_go
    DIY Elektronikdesigner
    piotr_go hat geschrieben:
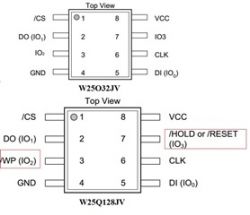
    Reminder:
    For first boot You may need to short pin 7 and 8 of flash.
  • #63 19178308
    Anonym
    Niveau 1  
  • #64 19178323
    piotr_go
    DIY Elektronikdesigner
    rrodic hat geschrieben:
    Shuld I get LEDs up without conecting pins 7 and 8 of W25Q128JV?

    No.

    rrodic hat geschrieben:
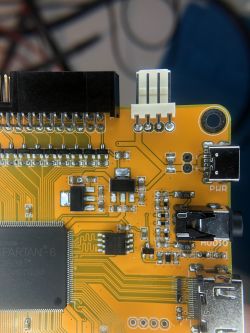
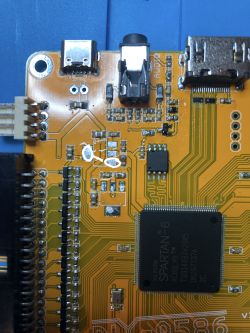
    I am noticing 1117M3 is getting hot quickly. Do I have right component here?

    Maybe you switched them? 1.2V close to FPGA. Check voltages.
    Check 16MHz generator.
  • #65 19178354
    Anonym
    Niveau 1  
  • WERBUNG
  • #68 19178440
    piotr_go
    DIY Elektronikdesigner
    rrodic hat geschrieben:
    Output Type: Adjustable.

    Hmmmm, if i'm not mistaken they should output 1.25V, that's good news.
    Which one heats up? 3.3V rail or 1.2V rail?
    Can you messure voltages?
  • #69 19178455
    Anonym
    Niveau 1  
  • #70 19178468
    piotr_go
    DIY Elektronikdesigner
    Desolder the 3.3V 1117 and check (pcb) if 3.3V is shorted to gnd.
    Measure 1.2V.
  • #71 19178538
    Anonym
    Niveau 1  
  • #72 19178568
    piotr_go
    DIY Elektronikdesigner
    rrodic hat geschrieben:
    I am not sure if this is normal?

    No.
    Desolder 16MHz generator (i'm guessing) and check again.
  • #73 19178898
    Anonym
    Niveau 1  
  • #74 19178936
    piotr_go
    DIY Elektronikdesigner
    rrodic hat geschrieben:
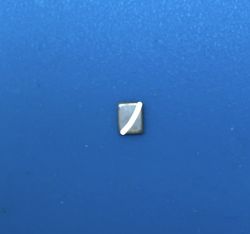
    I checked continuity of the crystal and looks like it will create a short every time if mouted vericaly?

    It's because it should be 16MHz 3.3V generator, not crystal.

    https://www.digikey.ca/en/products/detail/microchip-technology/DSC6111CI1A-016-0000/6211222
    https://www.digikey.ca/en/products/detail/sitime/SIT8008BC-23-33E-16-000000G/11388804
  • #75 19178955
    Anonym
    Niveau 1  
  • WERBUNG
  • #76 19179158
    piotr_go
    DIY Elektronikdesigner
    rrodic hat geschrieben:
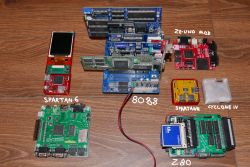
    In the meantime I want to show you what I did receantly

    Nice work.
    It must have cost a fortune.

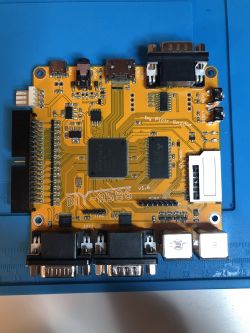
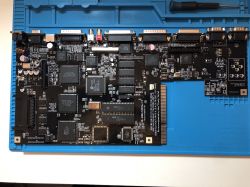
    DIY-A586 v1.6 von piotr_go

    8088 is Micro 8088, zx-uno pcb is modified by me.
    Rest are my retro projects.
  • #77 19179316
    Anonym
    Niveau 1  
  • #79 19179622
    Anonym
    Niveau 1  
  • #80 19184593
    Anonym
    Niveau 1  
  • #82 19185612
    Anonym
    Niveau 1  
  • #83 19185649
    piotr_go
    DIY Elektronikdesigner
    rrodic hat geschrieben:
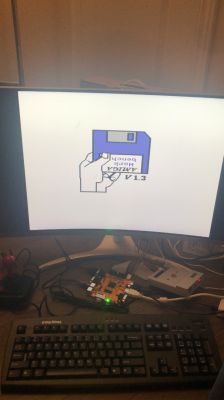
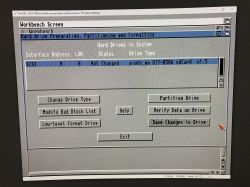
    I asume I just need to DD this RAW dump to SD?

    Yes

    rrodic hat geschrieben:
    Since I did that and I was not able to boot Workbench.

    What exactly happened?
    Can you make a video (with led's visible)? Start from power on.

    rrodic hat geschrieben:
    Is there any way we can DD already existing pre-installed Amiga HardDisk image?

    2 amiga partitions present in SD image.


    ================ update ================
    Amiga only SD image with 2 empty partitions.
    Updated Kickstart 3.1 patch.
  • #84 19186551
    Anonym
    Niveau 1  
  • #85 19186591
    piotr_go
    DIY Elektronikdesigner
    rrodic hat geschrieben:
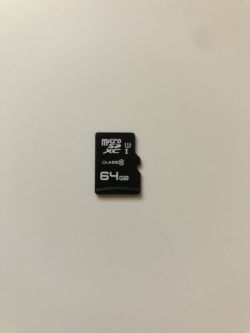
    First I am using new 2GB SD card.

    SDHC(>4GB) only.
    I didn't bother with the older ones as they can't be purchased anymore.
    (yeah, i know about ebay)
  • #86 19186738
    Anonym
    Niveau 1  
  • #87 19186771
    piotr_go
    DIY Elektronikdesigner
    rrodic hat geschrieben:
    dd if=SD_clean.raw of=/dev/disk3


    I write image with command:
    Zitat:
    cp SD_clean.raw /dev/sdX

    without number at the end.
    (Be careful)

    Are you sure your card is "/dev/disk3"?

    What "dmesg" shows when you insert your card.
  • #88 19186780
    Anonym
    Niveau 1  
  • #89 19186795
    piotr_go
    DIY Elektronikdesigner
    If the card works for uploadning cores, it should work with amiga.
    There must be something wrong with writing the image.
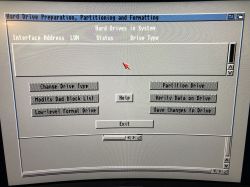
    Partitions should be visible in workbench.
  • WERBUNG
  • #90 19186798
    Anonym
    Niveau 1  
📢 Anhören (AI):

Themenzusammenfassung

Das DIY-A586 v1.6 ist eine FPGA-basierte Retrocomputing-Platine mit einem Spartan-6 XC6SLX9 FPGA, 8 MB 16-Bit SDRAM, 16 MB Flash-Speicher für Core und ROM, HDMI-Ausgang, analogem Audioausgang, Kassettendeck-Eingang, SD-Kartensteckplatz, RS232, zwei Joystick- und PS/2-Anschlüssen, Amiga 500 Tastaturanschluss sowie Diskettenlaufwerksanschlüssen. Die Flash-Speicher können bis zu 30 Konfigurationen speichern, die per Menü ausgewählt werden können. Die Diskettenlaufwerksunterstützung umfasst Amiga- und PC-Laufwerke, wobei für zwei Laufwerke ein spezieller DF0/DF1-Splitter mit PIC16F15313 als Motorsignal-Latch verwendet wird. Die Firmware unterstützt Amiga ECS (kein AGA wegen FPGA-Ressourcen), NES, Spectrum und PC (ca. 80186). Die Programmierung des Flash erfolgt initial über einen SPI-Programmierer (z.B. CH341A), danach Updates über SD-Karte möglich. Für den ersten Boot ist ggf. das Kurzschließen von Pins 7 und 8 am Flash erforderlich. Die SD-Karte muss eine MBR mit primärer FAT32-Partition besitzen; SDHC-Karten (>4GB) werden empfohlen. Die Amiga-Emulation benötigt Kickstart-ROMs (1.3, 3.1, 3.2) und kann von SD booten, wobei Disketten-Emulation nicht integriert ist. Gotek-Laufwerke sind mit modifizierten Kernen nutzbar, jedoch gibt es Einschränkungen bei Flash-Floppy. Die Platine wird manuell bestückt, Bauteile sind teilweise schwer erhältlich (z.B. AS4C4M16SA-5TCN SDRAM). Für Diskettenlaufwerke ist auf korrekte Verkabelung und Stromversorgung (12 V für originale Amiga-Laufwerke) zu achten. Die Community entwickelt Gehäuse (3D-Druck) und Komponentendatenbanken. Die Verilog-Quellen für den Amiga-Core sollen veröffentlicht werden. Probleme bei der SD-Karten-Erkennung und Bootvorgängen wurden durch unterschiedliche SD-Karten und Formatierungsmethoden gelöst. Die Platine ist als Open-Design verfügbar, kommerzielle Nutzung ist untersagt, Verkauf erfolgt nicht direkt, sondern als DIY-Kit. Die Diskussion umfasst auch Tipps zur Spannungsreglerwahl (SPX1117M3-L-3.3, TLV1117LV12DCYR), Taktgenerator (16 MHz 3.3V Generator, kein Kristall), und ESD-Schutz (PUSB3FR4Z).
Vom Sprachmodell generierte Zusammenfassung.
WERBUNG